Meshmixer tutorial: edit STL files for dental 3D printing
Use this Meshmixer tutorial to edit STL files from an intraoral scanner, create a dental model, and prepare it for 3D printing.
In this tutorial, we explain how to repair an STL file and create a 3D model with Meshmixer. The goal is to produce a design that can be printed on any dental 3D printer while saving material, reducing chairside workflow time, and getting more value from your intraoral scanner.
What is Meshmixer and why does it matter in digital dentistry?
Meshmixer is free, open-source software from AutoDesk. It is one of the leading tools for repairing STL files; to design with it, you will need .STL and .OBJ files.
- Meshmixer for STL editing: broad tools to repair and customize 3D files.
- Free and easy to use: intuitive software for both beginners and experienced users.
- Full compatibility: prepares STL files from intraoral and desktop scanners.
If you are a dentist using an intraoral scanner, 3D models are a key tool for optimizing several dental treatments, such as:
- 3D dental model to check the fit of a Michigan occlusal splint
- Dental STL model for dental veneer cases
- Models for clear aligner retainers
- Model for implant-supported hybrid prostheses
If you are a dentist looking to improve clinical outcomes through a digital workflow, get in touch with us.
Benefits of using Meshmixer to create 3D dental models
Digital dentistry is here to stay. Smileep is a digital dental laboratory focused on quality, with protocols designed to adapt to every level of clinical digitalization.
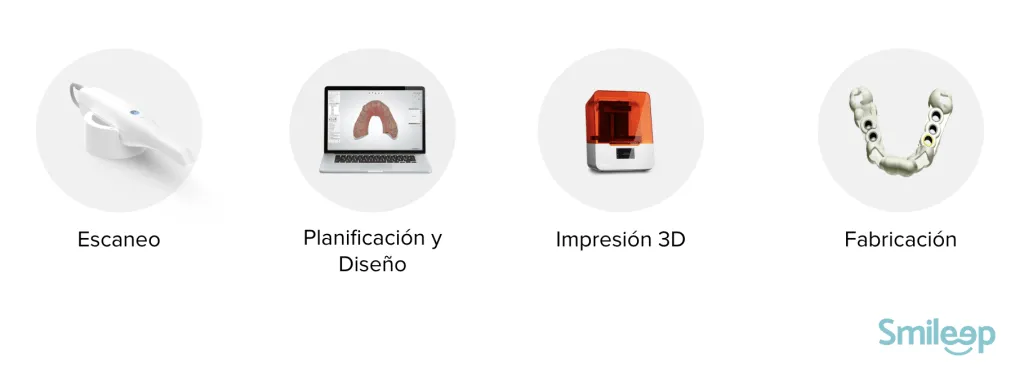
To optimize your dental digital workflow, start with digitalization through an intraoral scanner, then move to design with tools such as Meshmixer dental. With dental 3D printing and final manufacturing, Meshmixer helps you customize and improve the accuracy of prostheses and splints efficiently.
Meshmixer is one of the most widely used free software tools among dentists and dental lab technicians worldwide. Its popularity comes from its ease of use, intuitive design, and powerful editing tools for working with 3D meshes.
Digital CAD/CAM dental prosthetics: essential for your clinic
How to create 3D dental models with Meshmixer: step-by-step guide
Step 1: Import STL files
Export the dental STL models to your computer and import them into Meshmixer to start designing your customized 3D model.
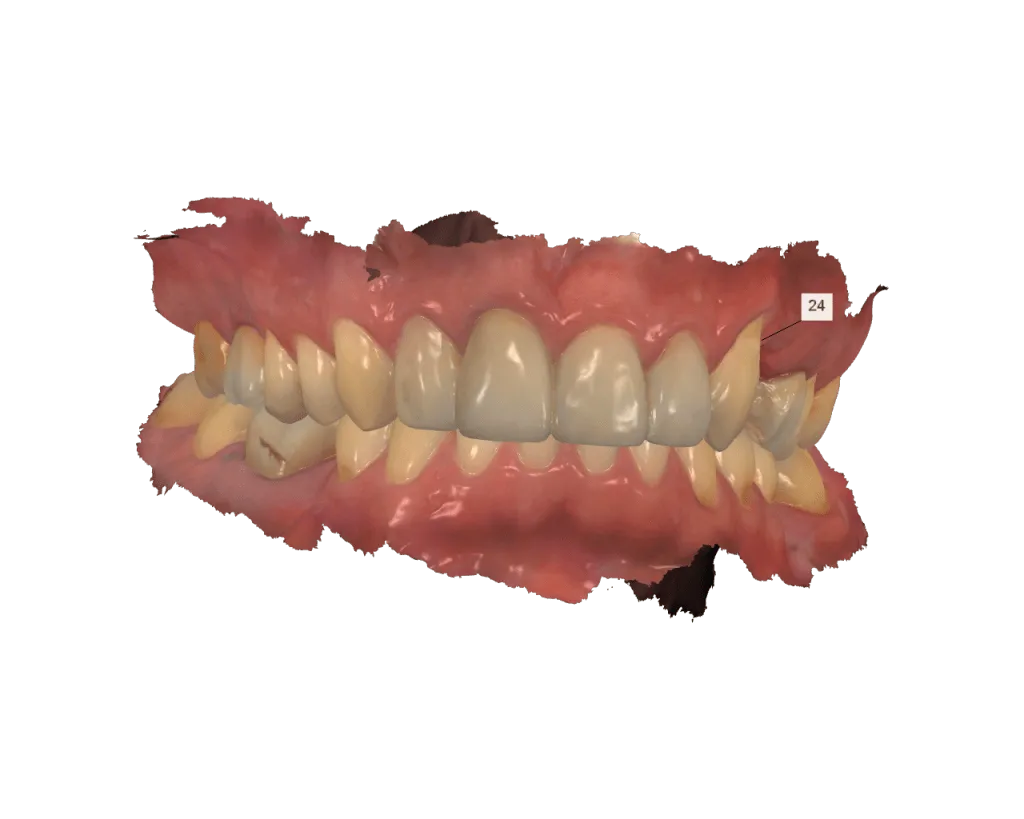
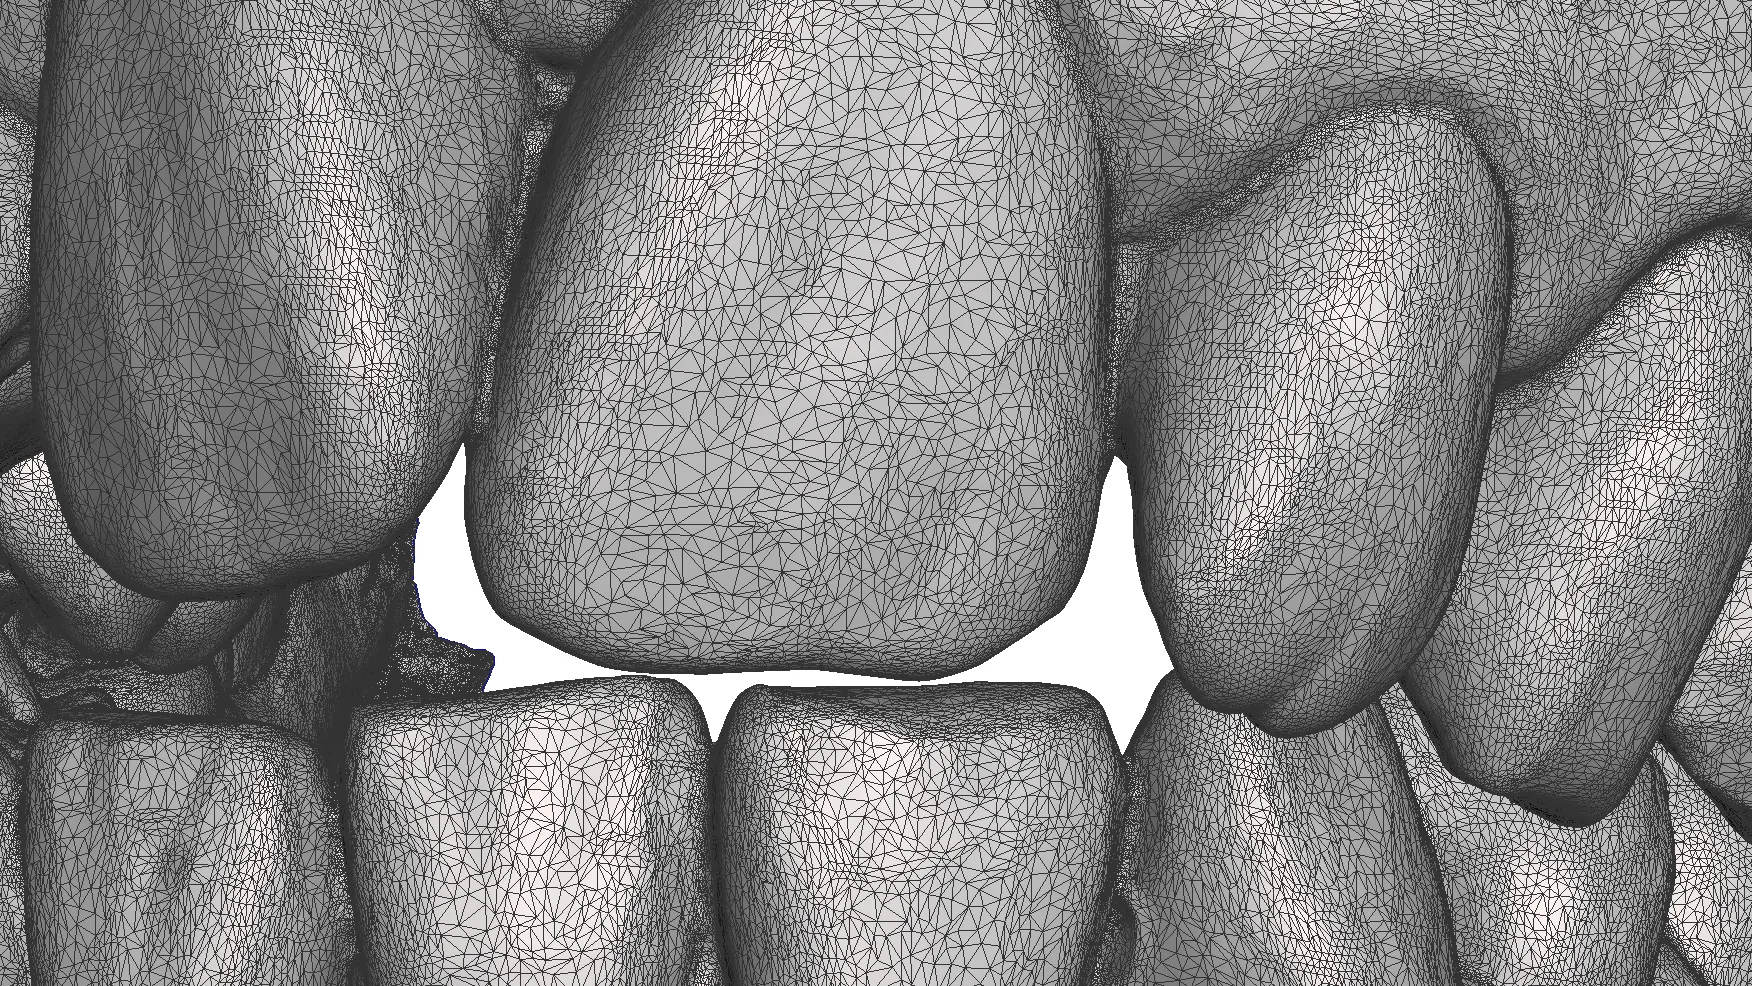
Intraoral scanners generate a digital file that forms a “3D mesh”. As a dental design tool, Meshmixer works with triangular meshes made up of vertices, edges, and faces. These triangles create an accurate representation of the object’s shape, such as the patient’s teeth and soft tissue, making it easier to design and customize dental models.
To print an intraoral scan, you need to create a 3D model with design software. Some scanners include this function directly in their scanning software. In this case, we explain how to do it with Meshmixer.
Step 2: Modify and edit the model
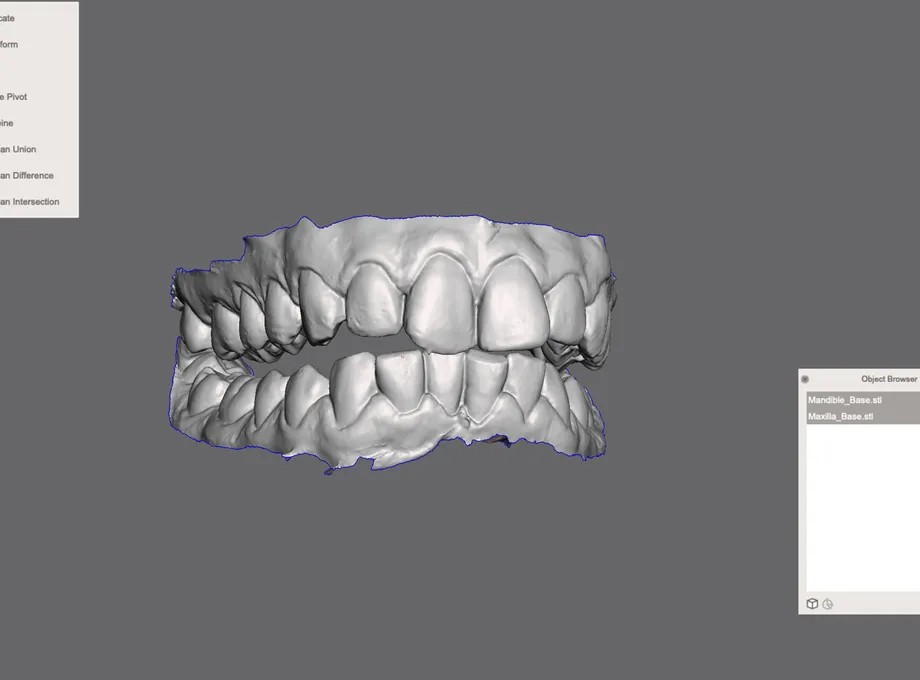
Next, import the 3D model you want to edit. To do this, launch Meshmixer and click «Import» in the center of the window. At the end of this tutorial, you will find a link to download our test model.
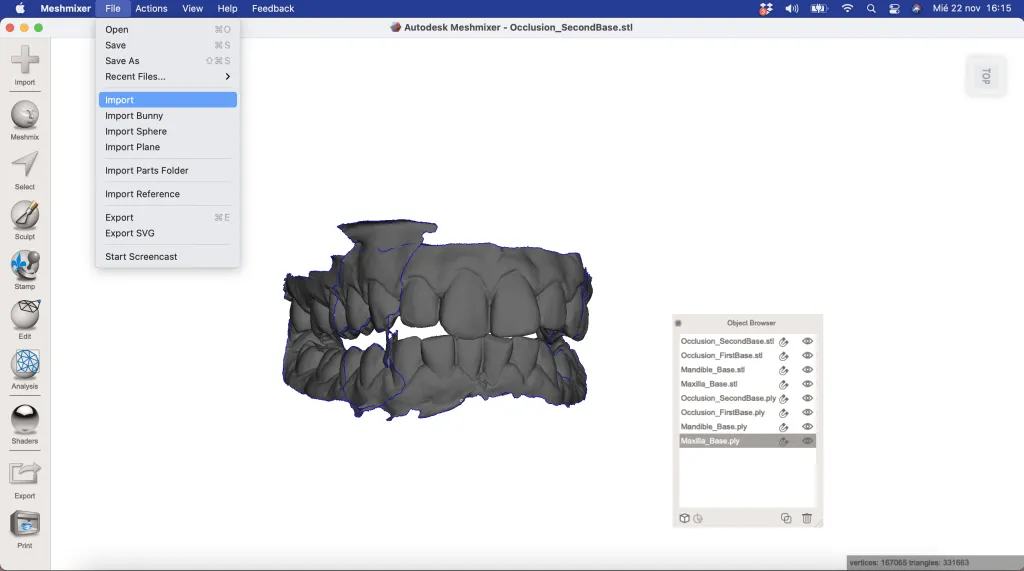
In the top bar of Meshmixer, select View and activate the Object Browser, which displays all imported files. In this case, you will see both the upper and lower arches as well as the different meshes from the occlusion scans. By clicking the «eye» icon, you can hide the files you do not need to edit and focus only on the dental arch. To make this dental model 3D printable, you need to correct it and close the mesh. You can change the appearance of the screen in Meshmixer by pressing the space bar. This lets you modify the background and interface colors to match your visual preferences and make the design process more comfortable.
Step 3: Edit the STL file
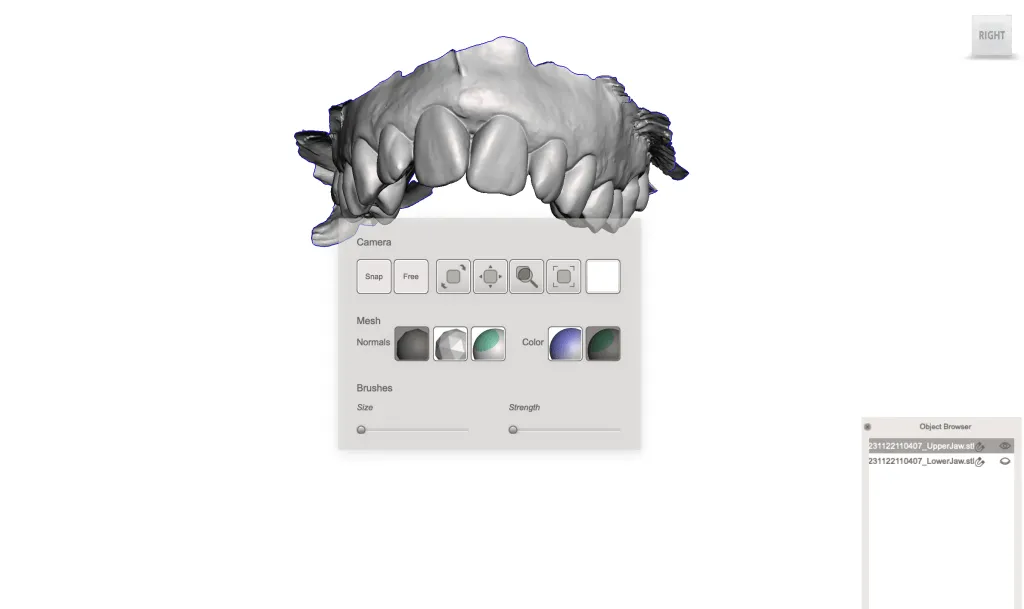
In Meshmixer dental, you can rotate the model by right-clicking and moving the mouse, zoom with the mouse wheel, and pan the view by holding the wheel down. In the View option in Meshmixer, turn elements such as the grid ( Grid ) or printer base ( Printer Bed ) on or off. If you need to adjust the orientation of the dental model, use Transform to change its position.

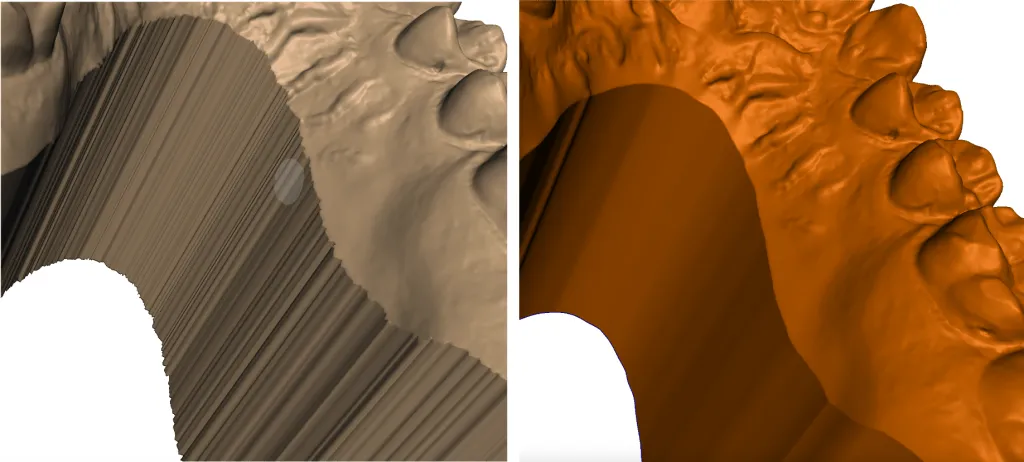
Often, the file needs to be “cleaned” before closing the 3D mesh so the 3D model can be printed without errors on your dental 3D printer.
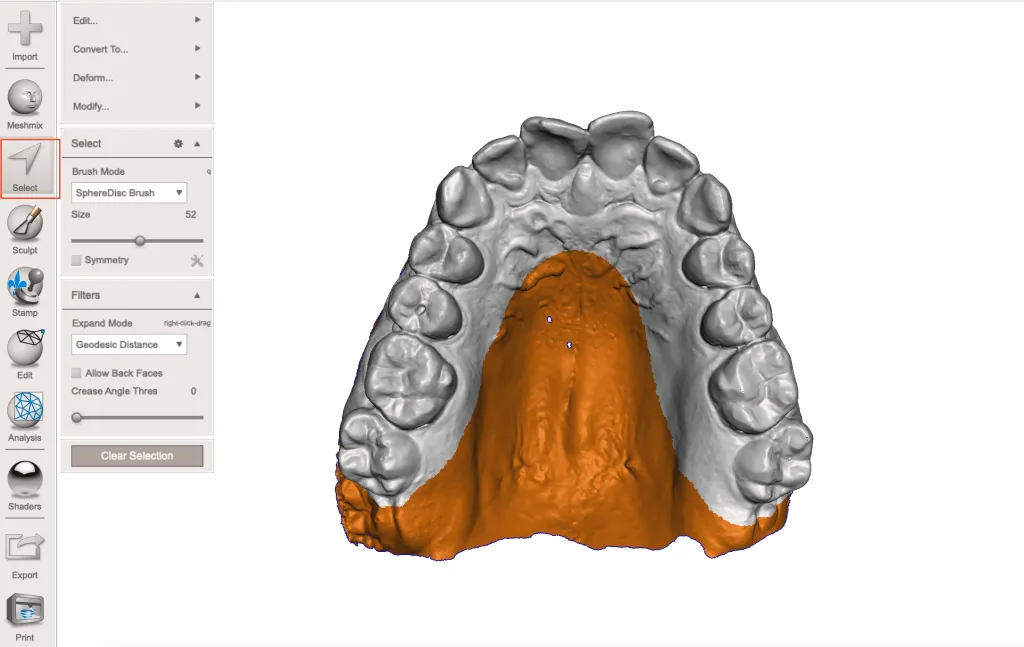
In Meshmixer dental, remove unnecessary parts of the mesh around the model to optimize design and printing. This helps you focus only on the relevant areas and improves the quality of the final model.
These mesh fragments are often generated during scanning and can interfere with the model design. In Meshmixer dental, use the Select Tool to select and delete these unwanted fragments, allowing you to work only with the relevant part of the model and optimize the final result.
The selected area will change color and, with Edit>Discard (or by pressing X), we delete the colored area.
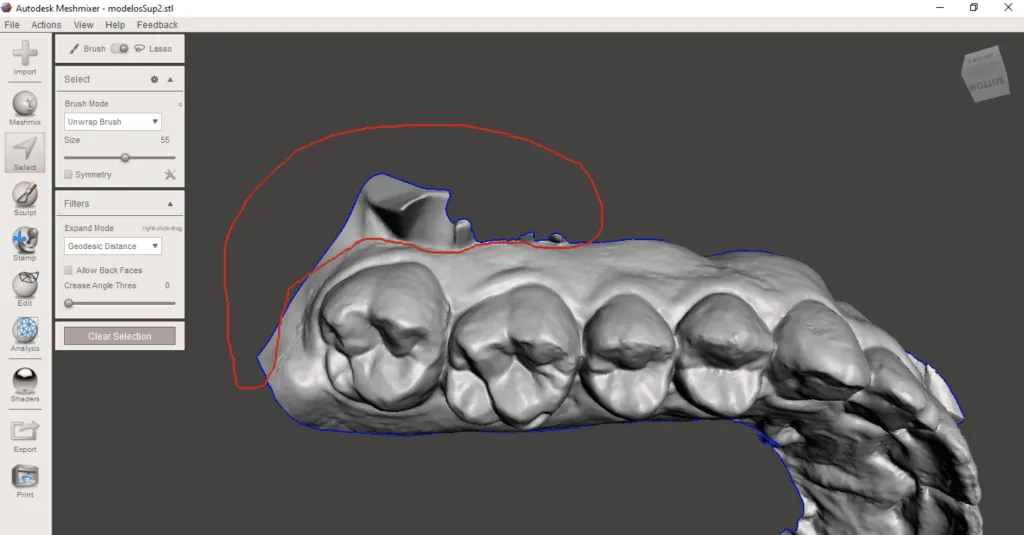
Removing the palate from the model is very useful when you want to save material during 3D printing.
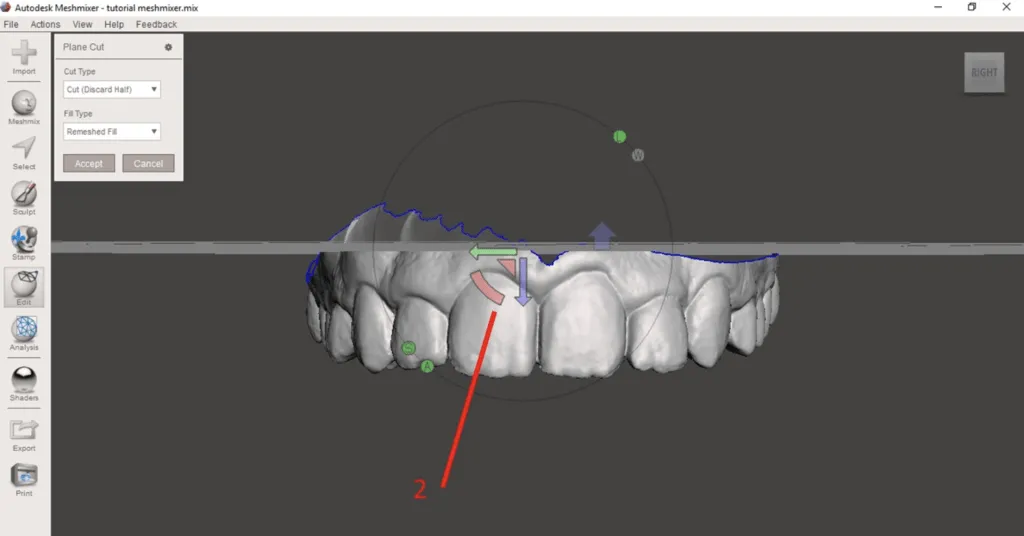
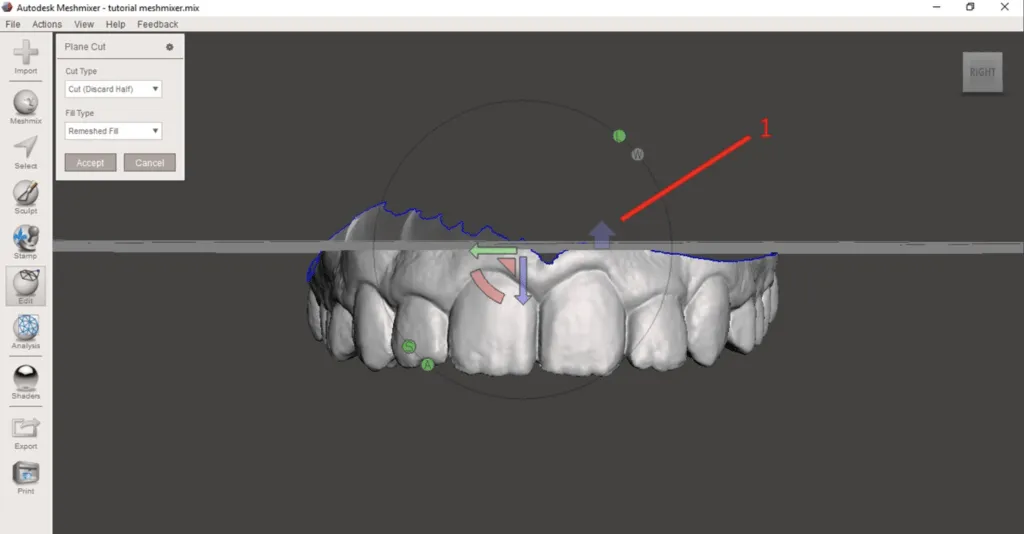
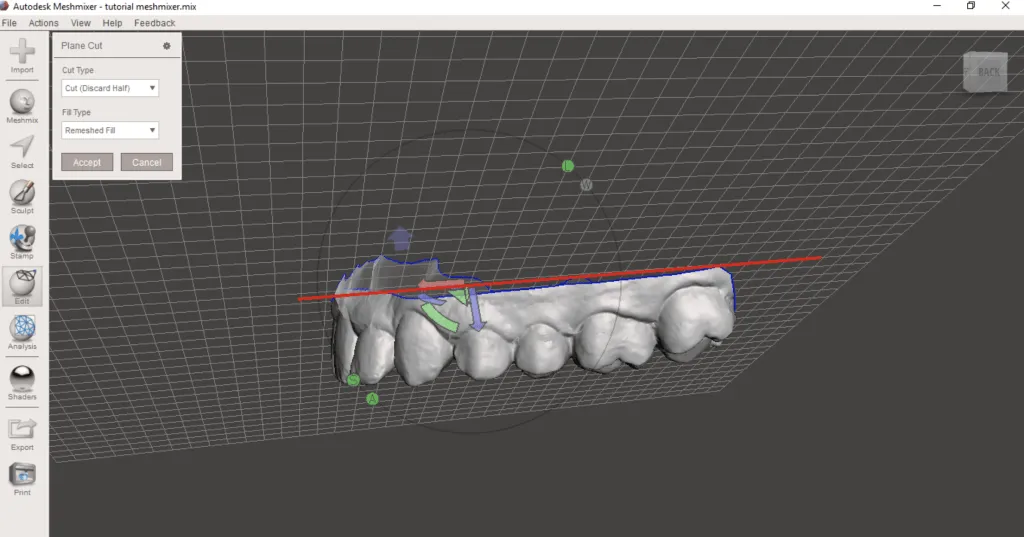
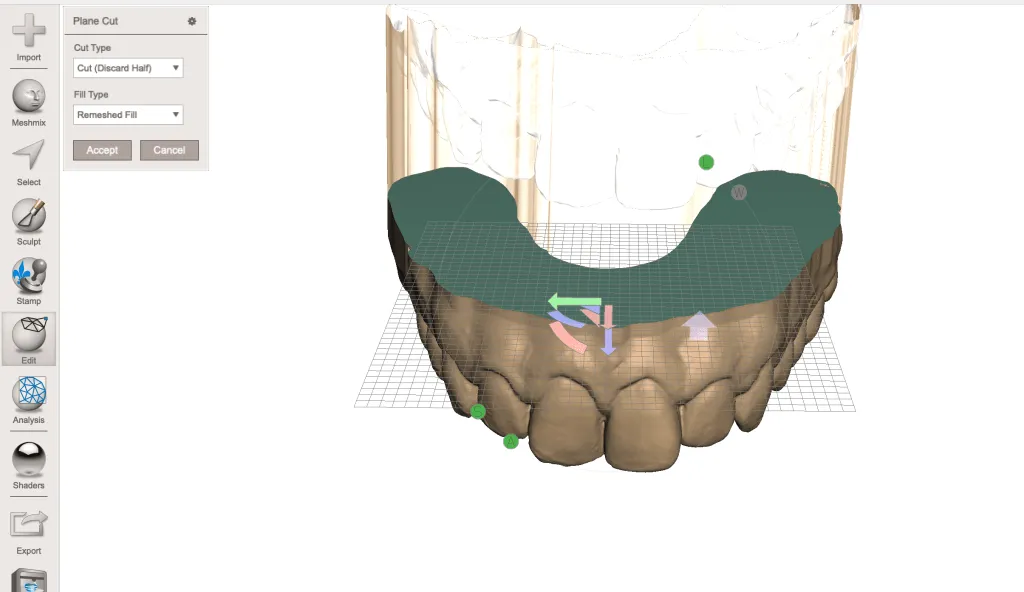
Another very useful tool is Plane Cut, which lets you cut the mesh with a plane.
Select Edit > Plane Cut.
In Meshmixer dental, adjust the cutting plane to remove unwanted areas of the model. Use the blue arrow (1) to change the cutting direction and remove the upper part of the model. With option (2), adjust the height and inclination of the cutting plane to optimize 3D printing.
A simpler way in Meshmixer dental is to move to a side view of the model and draw a reference line for the cutting plane. Left-click and move the mouse to draw the line, which will define the plane when you release the click. Once you are happy with the position, click Accept to make the cut.
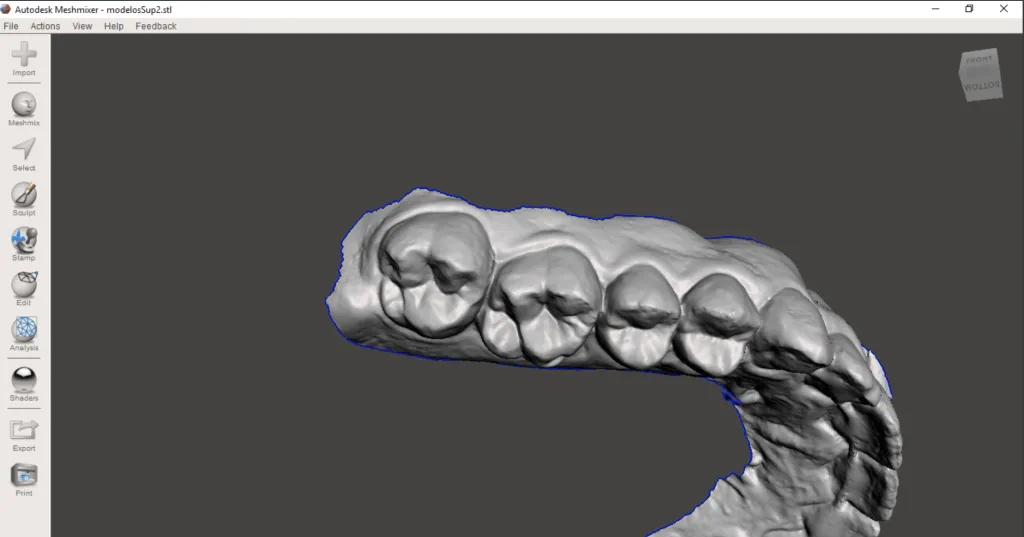
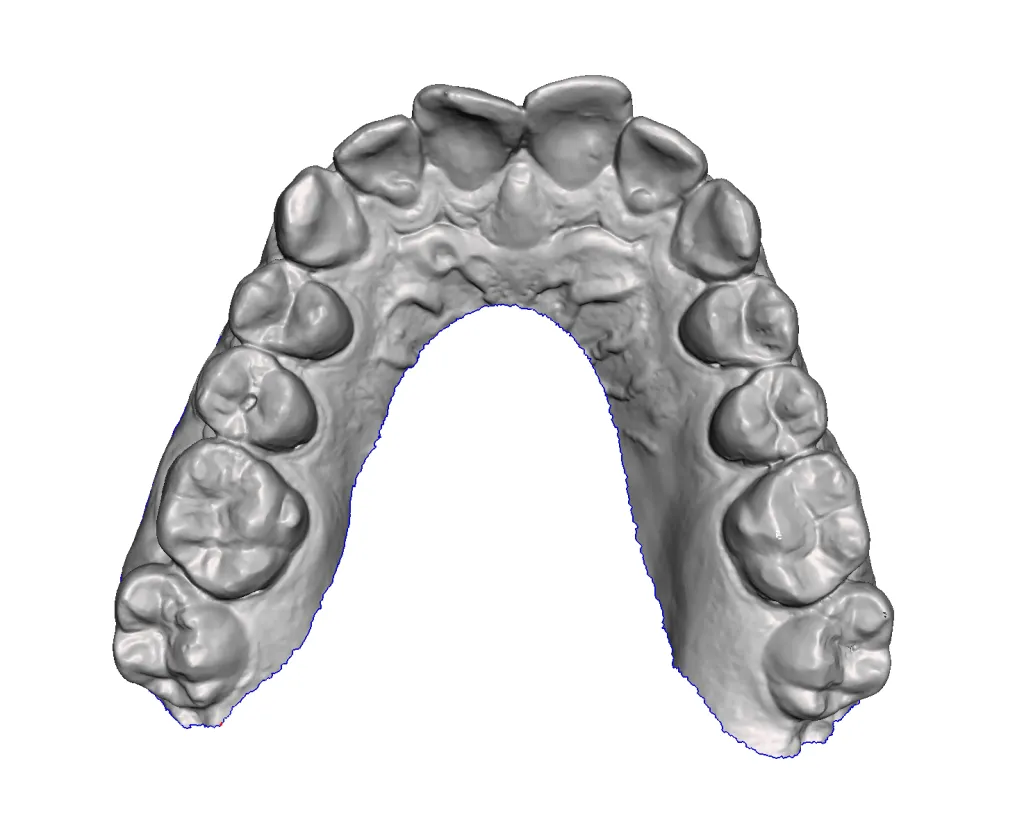
Great. The model is now “clean”; the only step left is to close the mesh for 3D printing.
Step 4: Create the STL file with Meshmixer
Before extruding the mesh in Meshmixer dental, it is important to clean the edges using the Sculp brush.
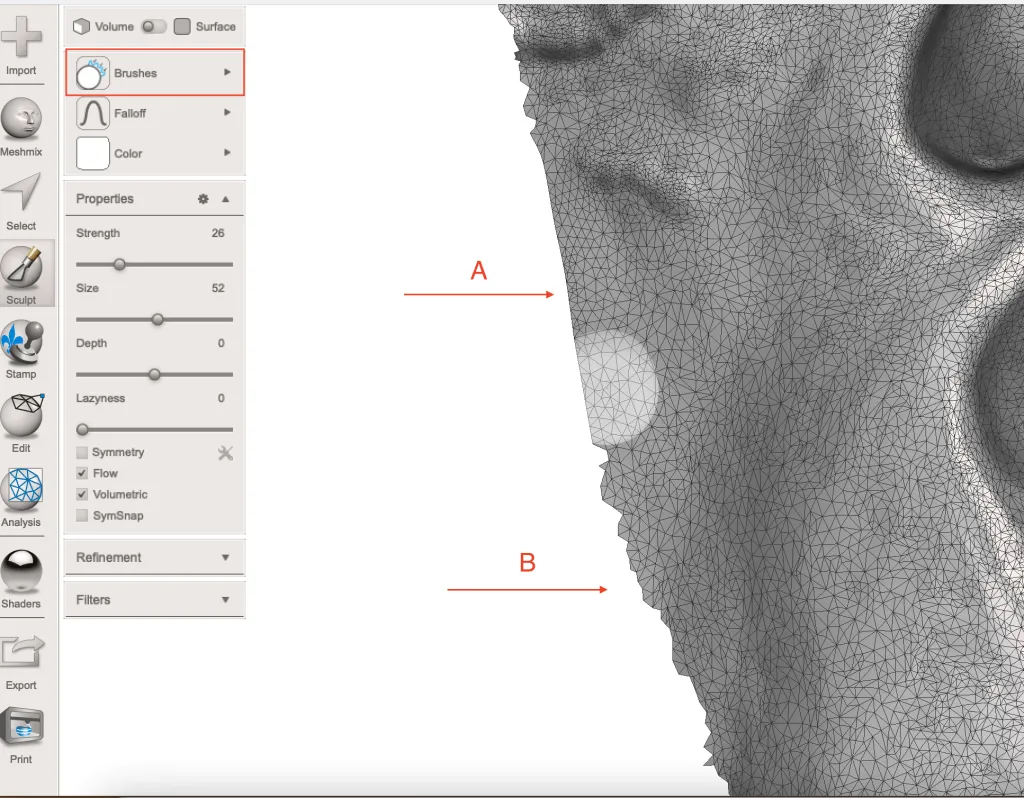
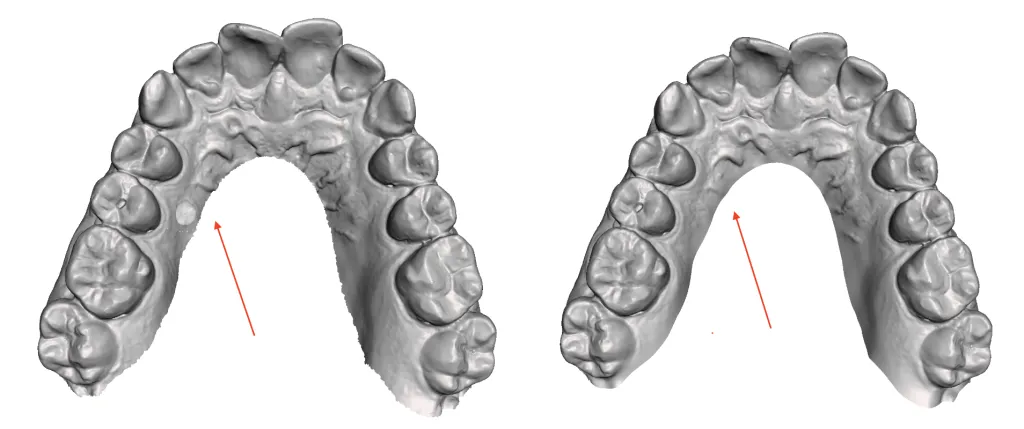
By smoothing the edges of the 3D mesh, we prevent irregularities on the base surface of the 3D model.
After smoothing the entire mesh edge, we can create the model. Press Ctrl+A to select the entire visible mesh, then in the panel that opens choose Select > Edit > Extrude, or press the D key to go directly.
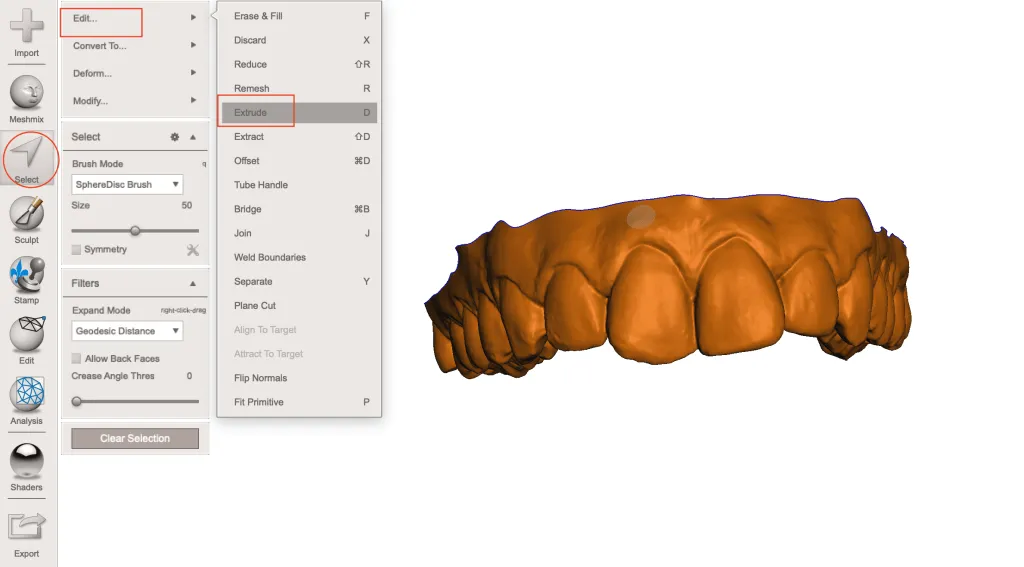
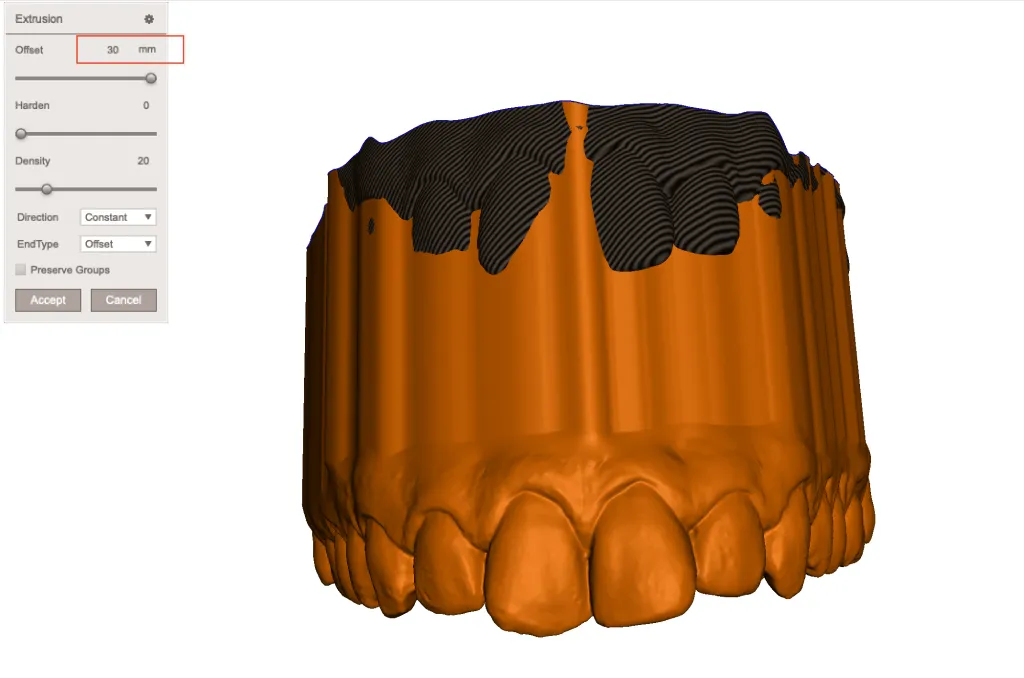
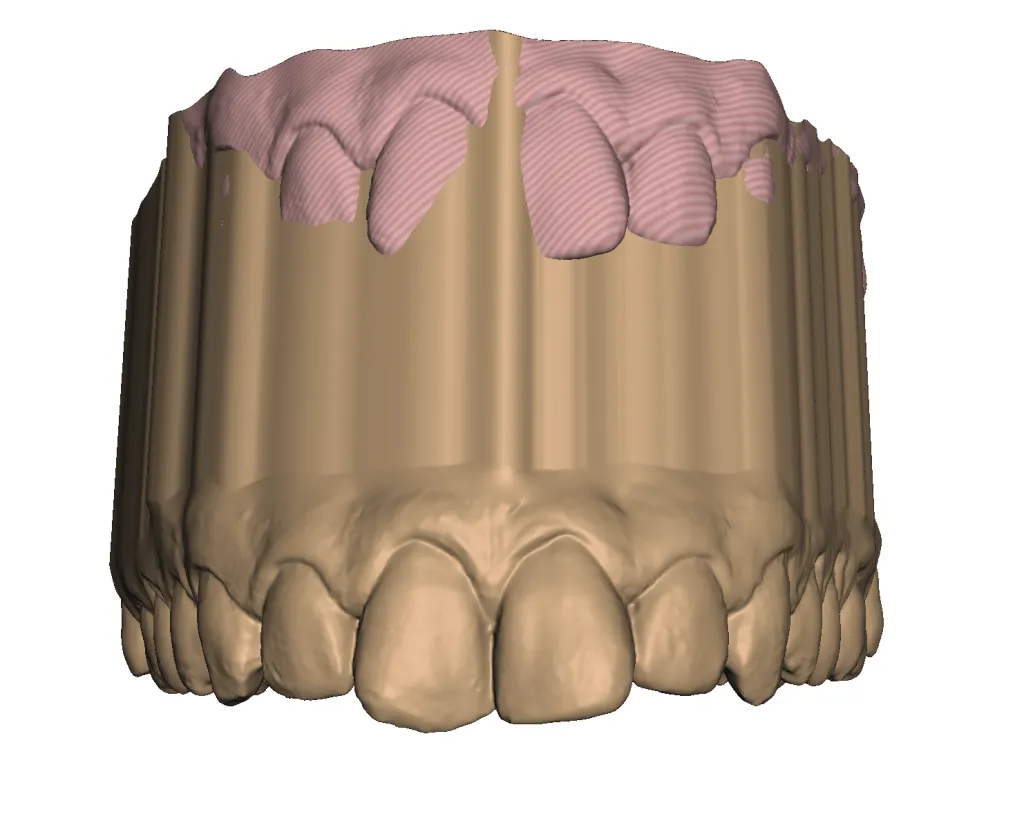
The Extrude tool in Meshmixer dental allows you to create an object from the selected section. When the whole mesh is selected, a base is generated for the 3D model. To do this, you can assign an Offset value, for example 30 mm, to leave enough margin for the later cut. This ensures a cleaner and more accurate finish for 3D printing.

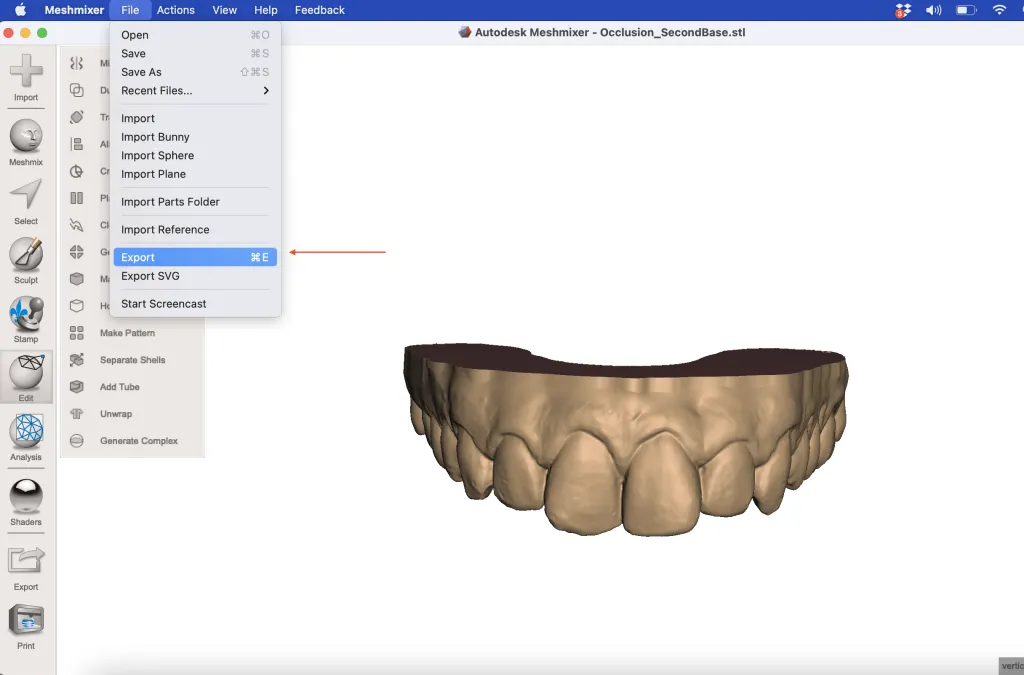
Step 5: Export for 3D printing
Printing a 3D model on a Formlabs 3D printing system is very easy. Just import the file into PreForm to configure the print, select the material, and send the case to your Formlabs 3D printer.
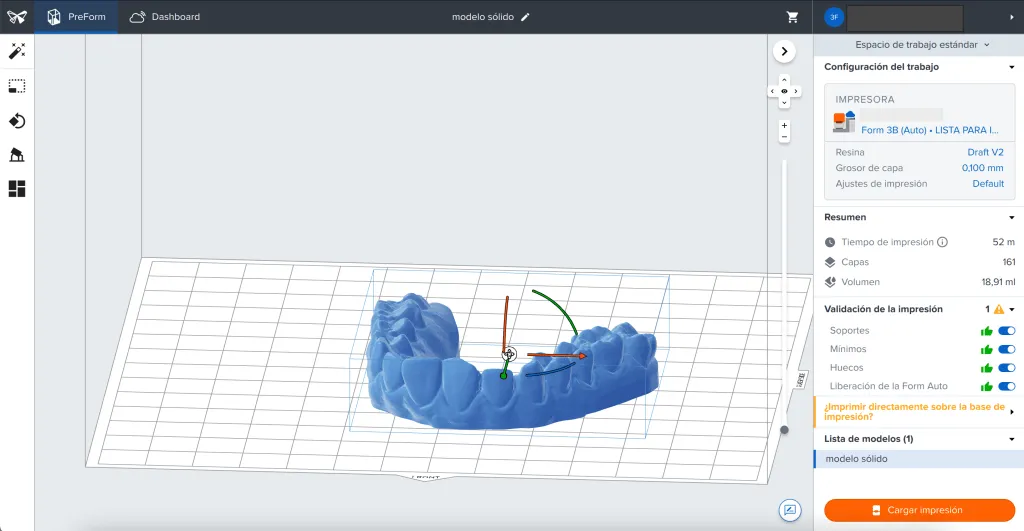
We can print the solid 3D model directly on the platform with a material consumption of 18.91 ml and a print time of 52 minutes.
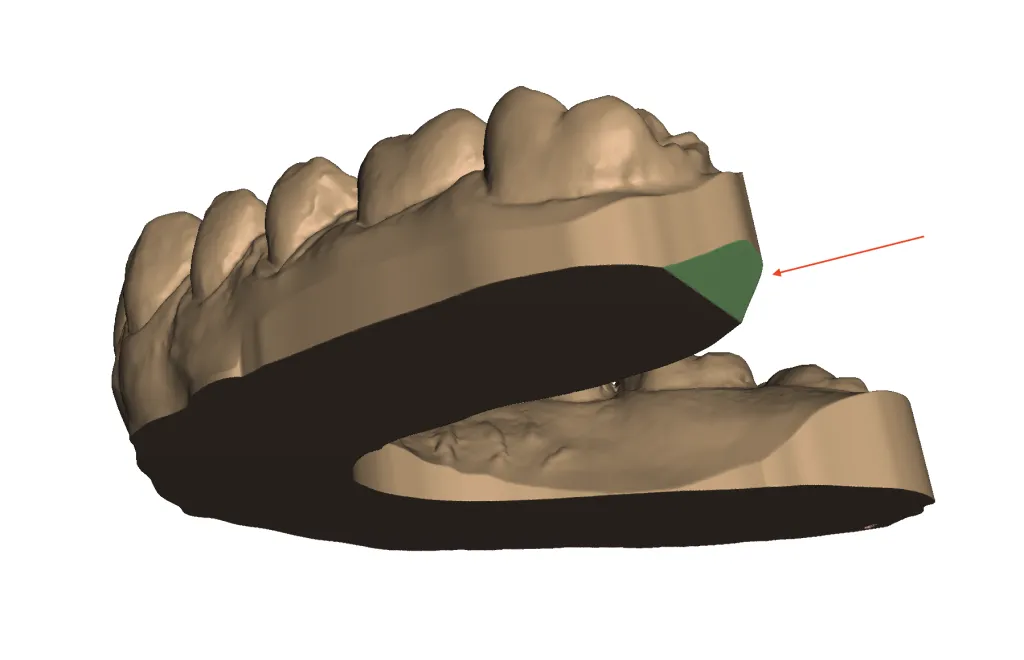
Tip: To print directly on the platform, we recommend adding a notch to the 3D model to make it easier to remove after printing:
See how a dental 3D printer can save time and costs.
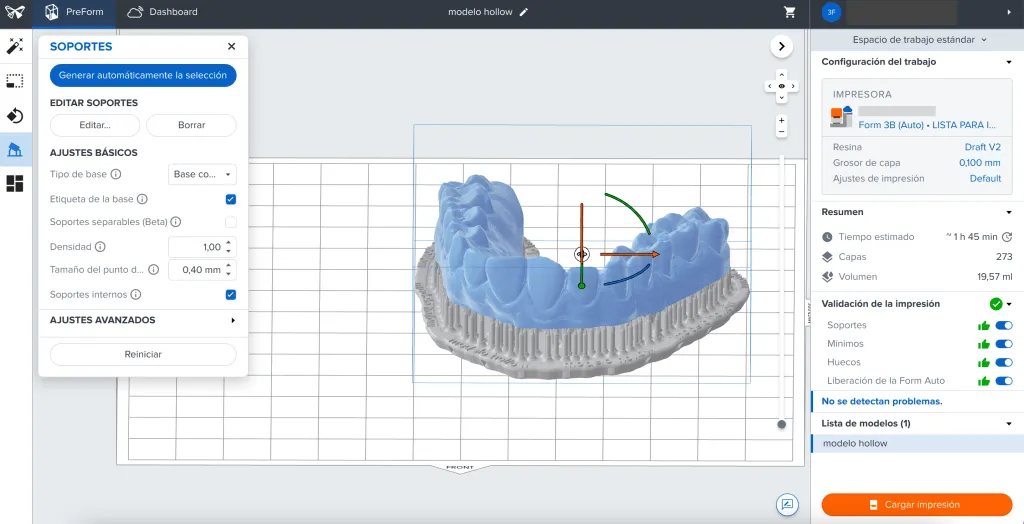
It is not advisable to print a hollow 3D model directly on the platform.
Elevate your dental laboratory with the Form 4B Dental from Formlabs: the 3D printer designed to deliver precision and quality in every print. Request more information and improve your results today.
If you run into problems during the process or errors during printing and need help, call us or tell us the best time for us to call you.