Digital Temporaries: the new era of 3D dental prosthetics
Discover how digital temporaries and 3D dental prosthetics are transforming workflows for dental clinics and laboratories.
Today, technology has transformed the dental sector, pushing laboratories and clinics to adopt digital processes that deliver precision, efficiency, and speed. Digital temporaries have become a key solution for manufacturing temporary dental prostheses, offering aesthetic and functional results that improve the patient experience.
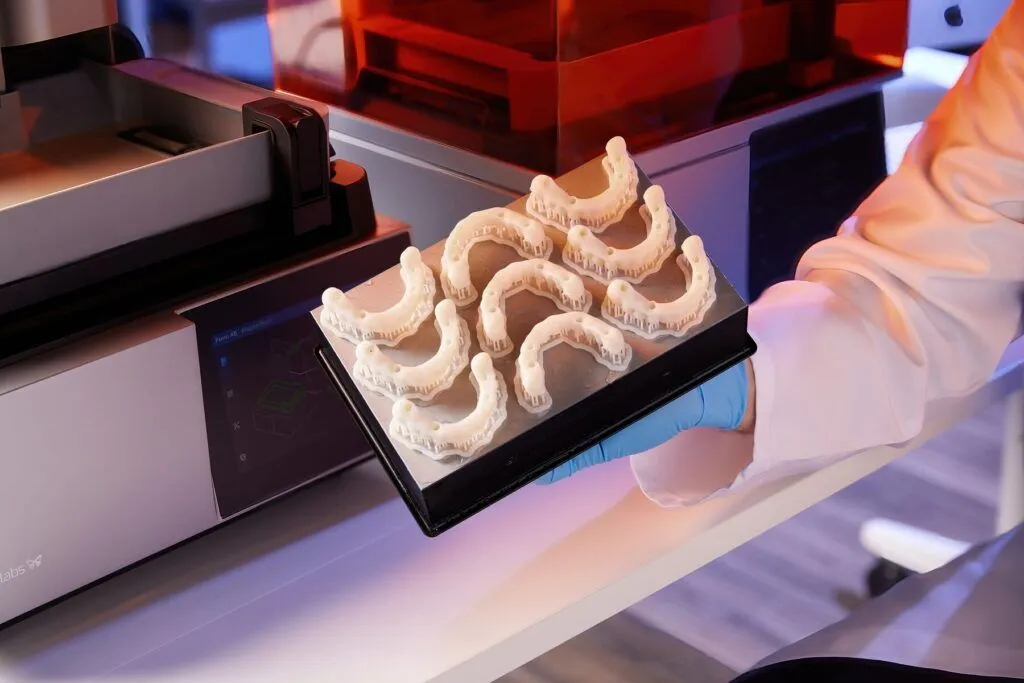
3D printing workflow in a dental laboratory
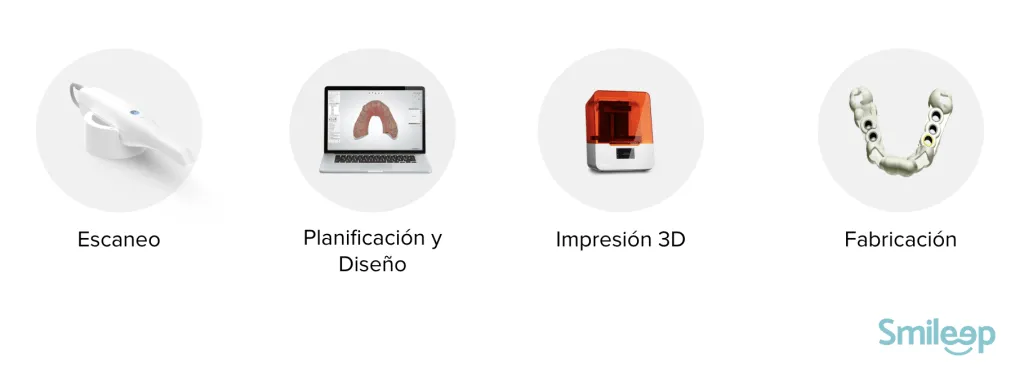
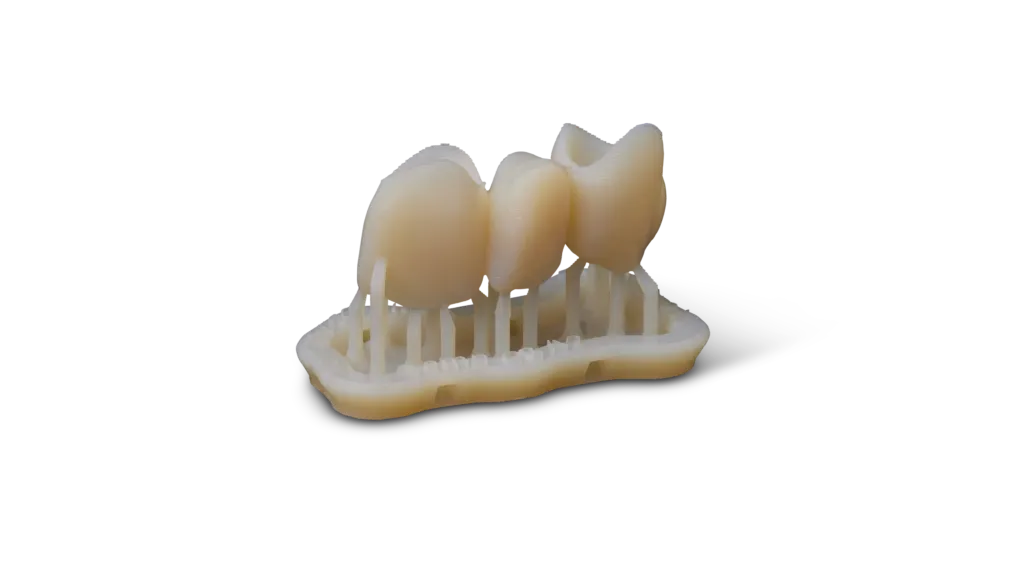
The digital workflow involves manufacturing a custom structure for a dental prosthesis using 3D printing technology, which acts as the main production system. This structure then requires detailed, personalized finishing by a dental technician to ensure an accurate fit and proper function in the mouth.
What are digital temporaries?
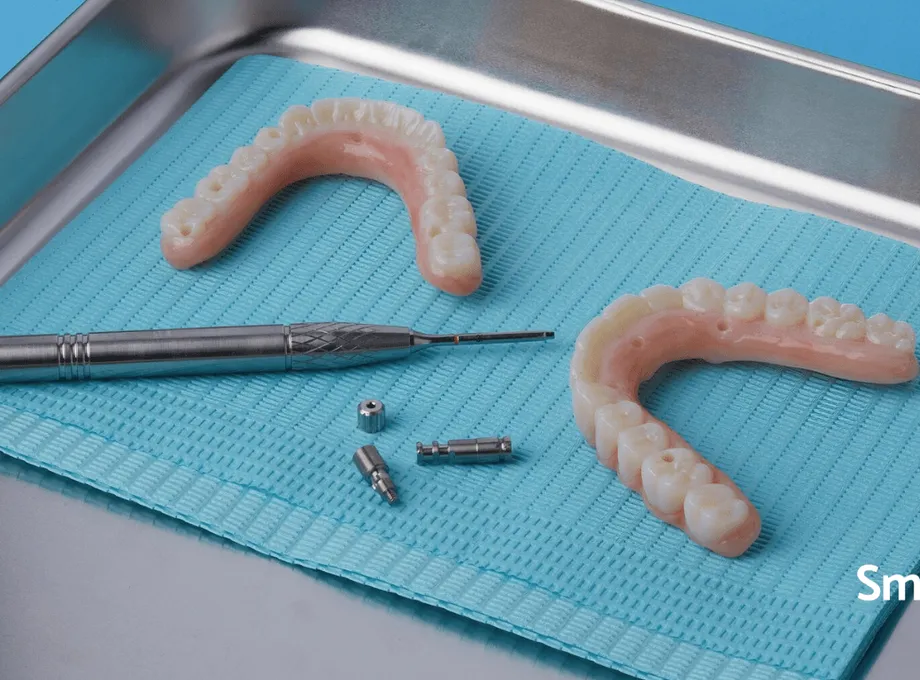
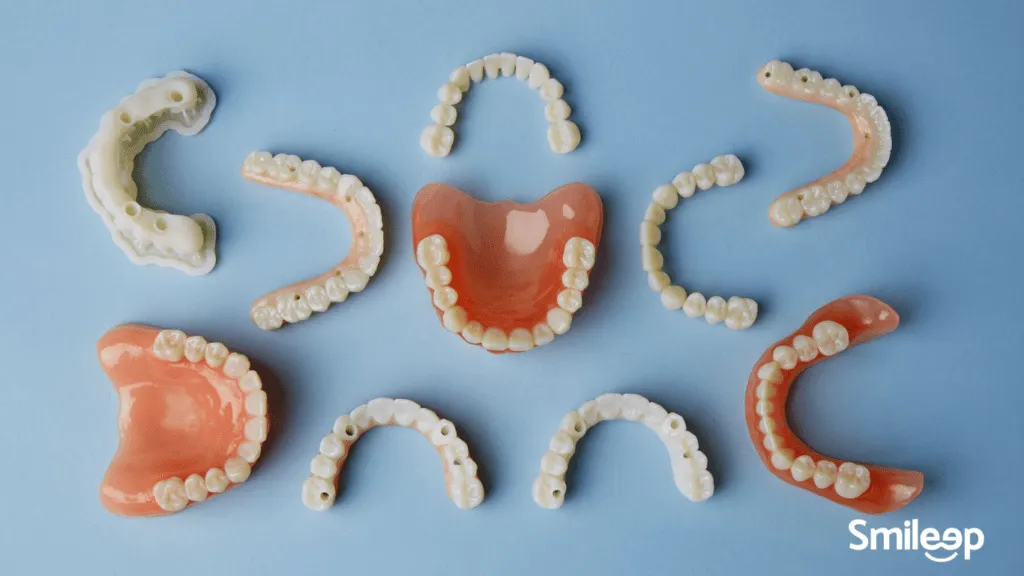
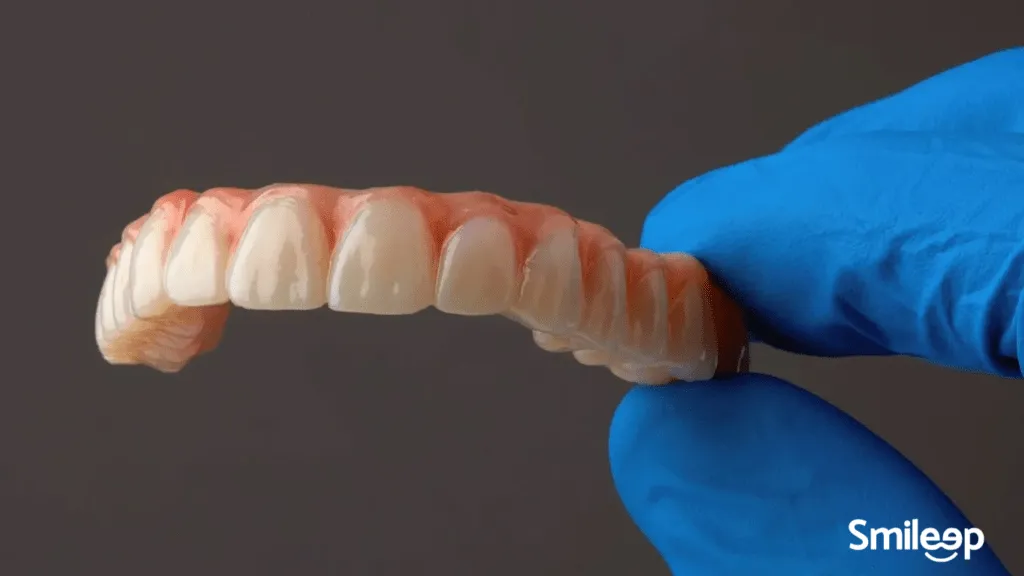
Digital temporaries are temporary restorations designed and manufactured with digital tools such as CAD software and 3D printing. This approach makes it possible to produce high-quality 3D dental prostheses, including crowns, bridges, and temporary All-on-X prostheses, in record time and with a higher level of customization than traditional methods.
With the use of the intraoral scanner in the dental clinic and CAD design systems combined with dental 3D printing through the Form 4B and certified processes, 3D printing of dental parts has become an established everyday practice, shaping both the present and the future of modern digital dentistry.
The technology behind digital temporaries
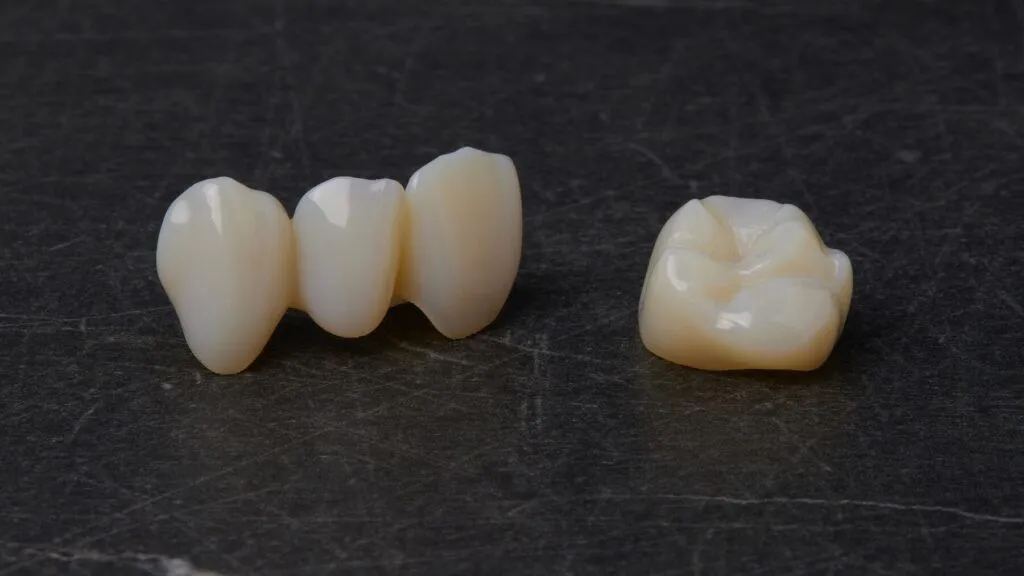
3D temporary crowns and bridges with Premium Teeth Resin.
The success of digital temporaries is based on tools such as the Form 4B, a high-precision 3D printer, and advanced materials such as Premium Teeth Resin. This nano-ceramic-filled material provides:
- Workflow efficiency: Reduces manufacturing and finishing time, increasing laboratory productivity.
- Natural aesthetics: A realistic appearance, with shades and translucency similar to natural teeth.
- High strength: Ideal for withstanding intraoral mechanical demands.
Advantages of adding 3D dental prosthetics
Manufacturing 3D dental prostheses offers multiple benefits:
- Cost optimization: Reduces material waste and production times.
- Speed: Makes it possible to create digital temporaries in a matter of minutes.
- Customization: Precise adaptation to each patient’s individual needs.
Premium Teeth Resin has become a trusted material in our dental laboratory. Its precision in printing applications, such as dental prostheses and All-on-X restorations, stands out for its consistency and quality. This resin is a valuable addition to our digital workflow, optimizing results and improving our clients’ experience by allowing us to offer faster, more precise solutions.
Premium Teeth Resin is a biocompatible material with nano-ceramic filler that improves aesthetics, mechanical properties, and longevity compared with previous materials, helping ensure optimal clinical performance. Its indications include full-arch implant-supported temporary prostheses and restorations (All-on-X appliances), single-unit temporary restorations (crowns, inlays, onlays, and veneers), and bridges of up to seven units, without compromising intraoral mechanics, realistic aesthetics, or workflow simplicity.
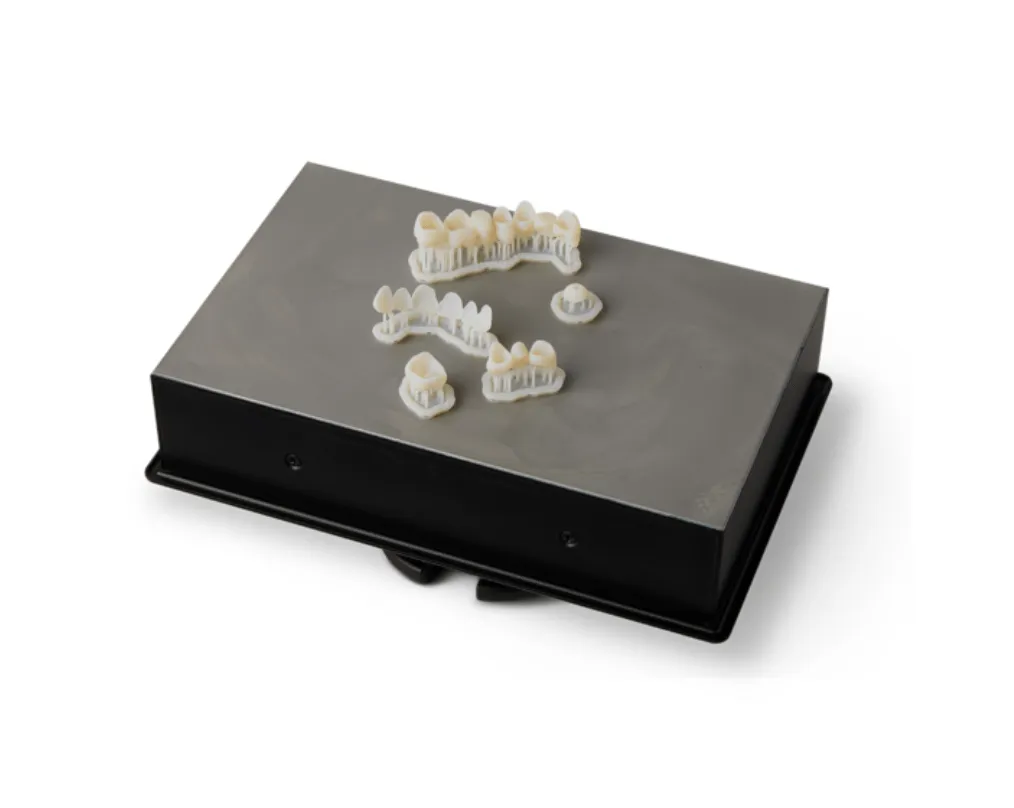
3D print teeth for 5 temporary restoration cases, 2 single-unit crowns, and 3 bridges of up to seven units in just 25 minutes.
Printing protocol on the Form 4B
Below, we explain the recommended protocol for producing digital temporaries using the Form 4B and Premium Teeth Resin:
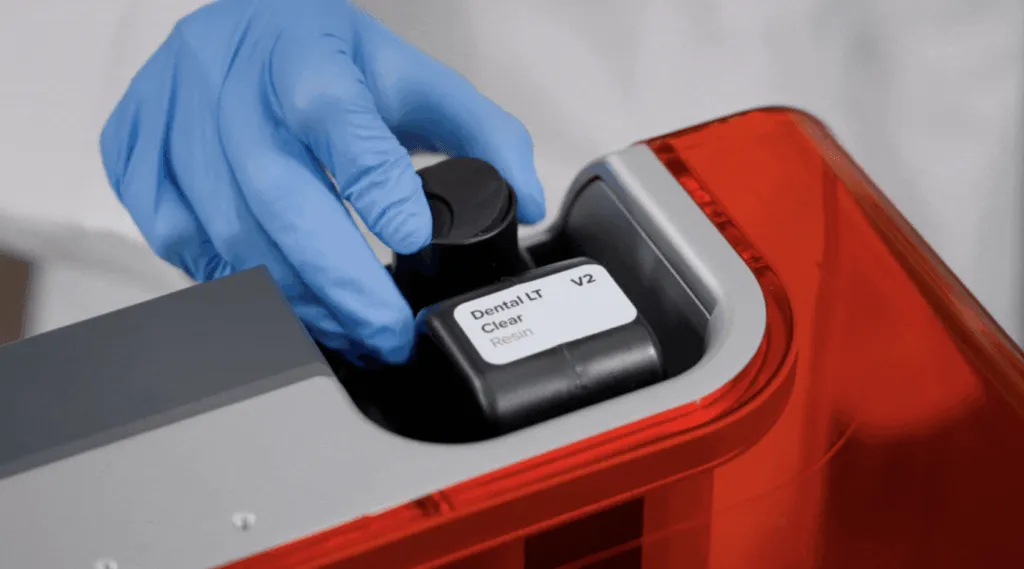
1 - Initial preparation
Shake the resin cartridge before use and insert both the cartridge and the resin tank into the printer:
2 - 3D printing process with the Form 4B
Design the digital temporary in CAD software, export the STL/OBJ file, configure the supports in PreForm software, and send the project to the printer; then start the print and let the Form 4B handle the rest.

The total print time is 23 minutes, with an approximate material consumption of 2 ml, which translates into a material cost of around €1 per unit. This efficient process makes it possible to produce high-quality temporary restorations at an accessible cost, optimizing both time and material resources.
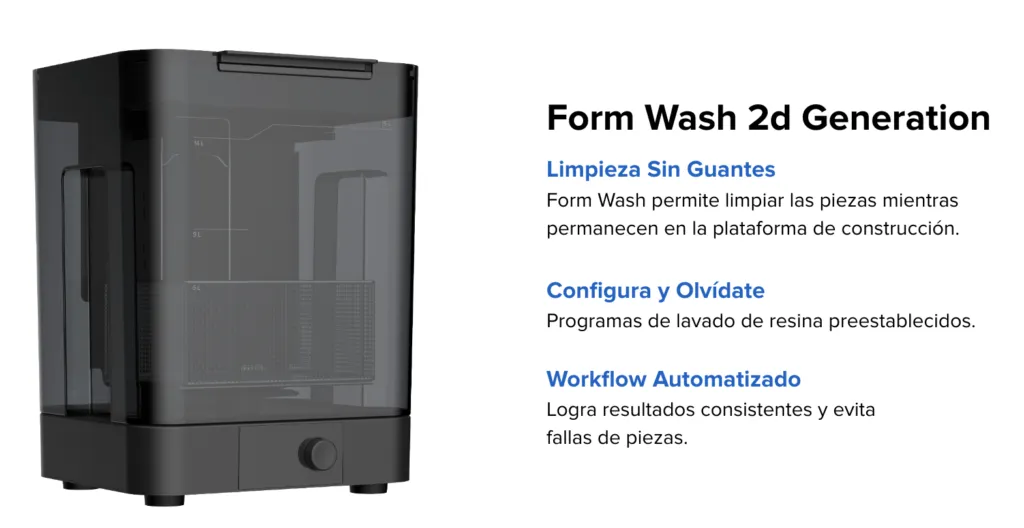
3 - Washing with the Form Wash
Wash the printed parts in a Form Wash unit using 99% isopropyl alcohol. Wash the parts for 10 minutes or until they are completely clean, making sure all resin residue is removed. This step is essential to ensure proper cleaning before continuing with drying and post-curing.
4 - Curing with Form Cure or Fast Cure
After drying the printed parts, perform an initial curing cycle to ensure material hardness and stability.
This process can be carried out in two ways:
- Form Cure: Cure for 30 minutes at 80°C.
- Fast Cure: Cure for 4 minutes at Light Intensity 3.
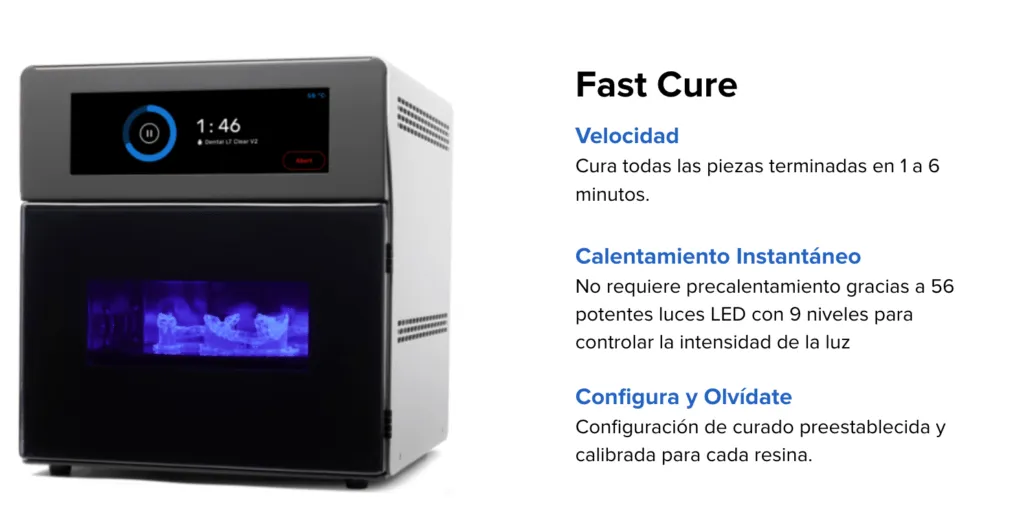
This curing step is performed as the parts come out of the printer, with the print supports still intact, helping strengthen the parts before the next finishing and assembly steps.
5 - Remove supports and polish the 3D dental prostheses
To ensure the quality and durability of the printed parts, it is essential to remove supports correctly and perform proper polishing:
-
Support removal: Marks left by supports can cause abrasion on the parts if they are not removed correctly. Use appropriate tools such as a cutting disc, hand bur, or cutting pliers to remove the supports. Make sure to proceed carefully to avoid damaging the surface of the part.
-
Polishing: Once the supports have been removed, use the standard dental polishing methods to give the restorations a smooth, aesthetic finish before clinical use. This will help ensure that the restorations are comfortable and safe for the patient.
-
Optional - Sandblasting: If desired, you can use a sandblaster with glass beads as the blasting medium to remove any defects or residual resin from the surface of the part, further improving the finish.
-
Optional - Light-curing varnish: For greater protection and aesthetic finishing, you can also apply a light-curing varnish, always following the material manufacturer’s instructions.
Final inspection: After polishing and finishing, it is essential to inspect the parts carefully for possible cracks or damage. If you find any imperfection, discard the part, as a damaged restoration will not provide the performance or safety required in clinical practice.
Temporary restorations are compatible with standard polishing tools and traditional temporary cements for bonding them to the patient’s teeth. If the resulting permanent restoration is bonded with a methacrylate-based composite cement, an eugenol-free temporary cement is recommended.
Why choose a digital dental laboratory?
A digital dental laboratory that uses technology such as the Form 4B not only improves restoration quality, but also reduces delivery times and optimizes costs. This ensures a faster and more precise service for both dentists and patients.